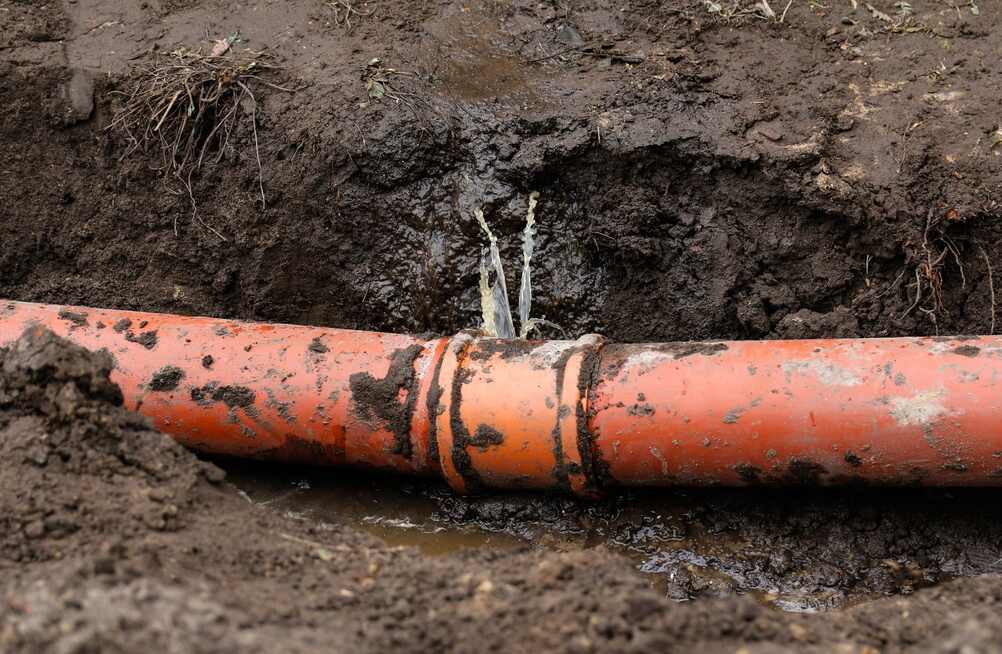
A leaking pipe does not always leave a puddle. Water can escape behind drywall, below a cabinet, beneath flooring, or under a concrete slab for days before anyone sees it. By then, the home may have damaged finishes, higher water use, or damp materials. Knowing the early signs of a hidden water leak can help Rock Hill homeowners respond before the problem spreads. These signs of a hidden water leak are often subtle at first.
No single symptom proves that a concealed pipe is leaking. A high bill can follow heavier household use. Musty odors may come from indoor humidity. Low pressure can have several plumbing causes. However, two or more unexplained changes that appear together deserve closer attention. The best first response is to document what changed, make safe observations, and avoid opening walls based on a guess.
E.R. Services helps homeowners trace unusual water use and moisture back to the source. Professional leak testing can narrow the search area and reduce unnecessary disruption when the leak is not visible. If you need local plumbing guidance or service, learn more about Plumbers in Rock Hill, SC.
What Is a Hidden Water Leak?
A hidden water leak is an unintended release from a supply pipe, fixture connection, appliance line, drain, or other plumbing component that cannot be seen easily. The water may remain inside a wall, ceiling, cabinet, crawl space, or floor assembly. Some leaks occur only when a fixture runs. Others continue as long as the plumbing system stays pressurized.
The location and leak type affect the symptoms. A pressurized supply leak may cause continuous meter movement even when no fixture is being used. A shower drain leak may appear only during bathing. A toilet can silently send water into the bowl without producing visible property damage. Therefore, the signs of a hidden water leak must be interpreted with timing and context.
Hidden does not mean impossible to detect. Water leaves evidence through usage records, sounds, temperature changes, odors, pressure behavior, and changes to building materials. Careful documentation helps a plumber decide where to test first.
Why Early Leak Detection Matters
Water follows gravity, but it can also travel along framing, pipes, wiring penetrations, and seams. As a result, the visible stain may sit several feet from the actual opening. Recognizing the signs of a hidden water leak before water drips into the room may limit damage to insulation, drywall, flooring, cabinets, or structural wood.
Early attention can also limit wasted water. The U.S. Environmental Protection Agency reports that household leaks can waste substantial amounts of water and recommends checking water use for unexplained changes. Its WaterSense leak guidance explains common checks for toilets, faucets, showerheads, and irrigation systems.
Finally, prompt documentation can help homeowners explain what happened. Photos, dated notes, meter readings, utility bills, and professional findings create a clearer timeline for repair decisions. These records may also be useful when discussing damage with an insurer, although coverage depends on the policy and circumstances.
Nine Signs of a Hidden Water Leak
The signs of a hidden water leak often start as small changes that seem unrelated. One clue may have an ordinary explanation. Several clues in the same area, or a symptom that steadily worsens, create a stronger reason to investigate.
1. An Unexplained Increase in the Water Bill
A bill that rises without a matching change in household activity is one of the clearest signs of a hidden water leak. Compare gallons used, not only the dollar total. Rates, billing periods, and fees can change even when consumption stays similar. Review the same season from the previous year if those records are available.
Account for visitors, irrigation, pool filling, pressure washing, new appliances, and longer billing cycles. If none explains the increase, start recording meter readings. Continuous low-level use may point to a toilet, irrigation valve, appliance connection, or concealed supply leak. Sudden large changes may need faster attention.
2. The Water Meter Moves When Everything Is Off
A moving meter during a verified zero-use period is among the most useful signs of a hidden water leak. First, confirm that toilets are not refilling, ice makers are not cycling, water softeners are not regenerating, and irrigation is not scheduled. Then record the meter reading or leak indicator without touching utility-owned equipment.
Wait during a period of zero intentional use and check again. Movement suggests water is flowing somewhere, but it does not identify the location. Some homes have fire suppression, irrigation, or other systems that require separate consideration. If the meter continues to move, a plumber can isolate fixtures or piping zones.
3. Warm or Unusually Cool Areas on the Floor
Warm or cool floor areas can become signs of a hidden water leak when no environmental source explains them. A warm patch may suggest hot water escaping below it. A cooler damp area can also appear as evaporation changes the surface temperature. However, sunlight, HVAC ducts, appliances, and radiant heating can produce similar patterns.
Do not treat temperature alone as proof of a slab leak. Mark the edges of the area with removable tape, note when it feels warm, and compare it at different times. A plumber may use thermal imaging as one part of an investigation, then confirm the finding with additional tests.
4. Musty Odors That Return After Cleaning
Persistent earthy or musty smells can be signs of a hidden water leak when they develop near plumbing. The odor may be strongest near a cabinet, wall base, closet, or flooring transition. Cleaning the room may briefly mask it, but the smell returns because the moisture source remains.
Humidity, wet shoes, HVAC condensation, roof leaks, and exterior water entry can create similar odors. Check whether the smell becomes stronger after using a nearby sink, shower, or appliance. If it does, note that timing for the plumber. Avoid covering the odor with fragrance because it can make the pattern harder to track.
5. Peeling Paint, Bubbling Drywall, or Warped Finishes
Paint may blister when moisture separates it from the surface. Drywall can soften, swell, crack, or discolor. Baseboards may pull away, laminate may cup, and wood flooring can change shape. These signs of a hidden water leak deserve attention when they develop without known spills or roof problems.
Do not press hard on swollen drywall or puncture a bulge. Water may be trapped behind the surface, and nearby electrical wiring can increase the danger. Photograph the area from several angles, keep people away, and request prompt help if the material is sagging or water is near electrical components.
6. Reduced or Fluctuating Water Pressure
A concealed supply leak can reduce available pressure, especially when it releases a meaningful volume. Yet low pressure can also result from a partially closed valve, clogged aerator, pressure regulator problem, municipal work, corrosion, or simultaneous household demand.
Compare hot and cold flow at more than one fixture. If only one faucet is weak, its aerator or local connection may be involved. If the whole house changes suddenly and meter activity continues during zero use, contact a plumber. Avoid adjusting a pressure regulator without proper testing.
7. Damp Cabinets, Closets, or Wall Edges
Cabinet floors can hide slow leaks from supply stops, faucet connections, disposals, filters, and appliance hoses. Water may collect at the back, soak into particleboard, or travel through a small opening before it becomes visible. Closets on the opposite side of a bathroom wall may show dampness first.
Use a flashlight and look without disturbing electrical connections. Check for swelling, staining, corrosion, mineral deposits, or damp stored items. Remove belongings only if the area is safe. If water is active, shut off the appropriate accessible valve when you know how to do so safely.
8. Recurring Mold or Mildew in the Same Area
Mold needs moisture, but plumbing is only one potential source. Condensation, poor ventilation, roof leaks, exterior drainage, and indoor humidity can also keep a surface damp. The clue becomes more relevant when growth returns in the same place after cleaning and appears near plumbing.
Do not disturb a large area of suspected mold or open a wet wall without a plan. Photograph visible changes and note any connection to fixture use. A leak professional can investigate the water source, while qualified remediation guidance may be needed for affected materials. Repairing the pipe alone does not automatically dry or restore the building.
9. The Sound of Running or Dripping Water
Hissing, dripping, or faint running sounds during a quiet period can point to moving water. Listen near toilets, cabinets, appliance connections, walls, and floors after every fixture has been turned off. A refrigerator, HVAC condensate line, water heater, or toilet fill valve may also make normal intermittent sounds.
Record when the sound starts, how long it lasts, and whether the meter moves at the same time. Do not place an ear against electrical panels or unsafe surfaces. Persistent sound paired with unexplained meter movement is a stronger signal than sound alone.
Signal Versus Possible Cause
This table is a screening aid, not a remote diagnosis. Several conditions can produce the same symptom, and water may travel before it becomes visible.
| Signal Observed | Possible Plumbing Cause | Other Explanation to Consider | Safe Next Step |
| Water use rises without a routine change | Toilet leak, irrigation leak, concealed supply leak | Longer billing period or rate change | Compare gallons used and complete a zero-use meter check |
| Meter moves during verified zero use | Pressurized leak or running fixture | Scheduled softener, irrigation, or ice maker cycle | Turn off scheduled devices and repeat the observation |
| Warm floor area | Hot-water line below the floor | Sunlight, HVAC duct, radiant heating, appliance heat | Mark the area and record when the temperature changes |
| Musty odor near plumbing | Damp cabinet, wall, or floor material | Humidity, roof leak, exterior water entry | Note timing and inspect accessible surfaces safely |
| Peeling or swollen finish | Water behind the surface | Old coating, condensation, or exterior moisture | Photograph it and avoid puncturing the material |
| Whole-house pressure drops | Supply leak or service-line issue | Municipal work, valve, or pressure regulator problem | Compare fixtures and check for utility notices |
| Mold returns in one location | Persistent moisture from a pipe or drain | Ventilation or condensation problem | Find and correct the moisture source before refinishing |
| Running-water sound during quiet periods | Active supply leak or toilet refill | Appliance or HVAC operation | Match the sound with meter movement and appliance cycles |
How to Check for a Hidden Water Leak Step by Step
Use this process to collect reliable clues without damaging the home. It works best during a quiet period when no one needs water. The goal is to confirm whether unexplained flow exists and narrow the affected area. It is not a substitute for professional location testing or a reason to open walls.
- Review recent water use. Compare gallons across several bills and note billing-period length. List visitors, irrigation changes, appliance use, or outdoor projects that might explain a rise. If the increase remains unexplained, save copies of the bills and record the date you first noticed it.
- Create a true zero-use period. Turn off faucets and fixtures. Do not run the dishwasher or washing machine. Confirm that toilets have stopped filling and pause scheduled irrigation or water-treatment cycles when you can do so correctly. Tell everyone in the home not to use water during the check.
- Record the meter without handling utility equipment. Photograph or write down the reading and note any leak indicator. Wait 30 to 60 minutes if practical, then compare. A longer test can reveal a slow leak, but do not delay if active damage, falling material, or electrical risk is present.
- Isolate accessible fixtures carefully. Check toilets, under-sink connections, appliance hoses, and the water heater for visible activity. Use fixture shutoff valves only when they are accessible and known to work. Do not force a corroded valve. Repeat the meter observation after isolating a suspected fixture.
- Escalate based on evidence. Continuous meter movement, spreading moisture, warm flooring, or repeated mold near plumbing justifies professional testing. Share readings, photos, bills, and timing notes. This evidence helps a technician choose appropriate isolation, acoustic, pressure, moisture, or thermal methods.
These steps help organize the evidence behind the signs of a hidden water leak. If water is actively spreading or reaching electrical components, prioritize safety, use an accessible main shutoff only if trained, and request urgent help.
When to Check for Concealed Leaks
Check promptly after an unexpected increase in metered water use, a new moisture stain, a persistent sound, or an unexplained pressure change. Waiting for several billing cycles can allow continuous water loss to continue. A quick observation today creates a baseline for comparison tomorrow.
Seasonal checks also make sense after freezing weather, extended travel, remodeling, appliance installation, or work near a service line. Inspect accessible hoses and connections after moving a refrigerator, washing machine, or dishwasher. Review little-used bathrooms because leaks can develop where no one visits daily.
Home buyers may want a plumbing evaluation when records show prior water damage or unexplained repairs. Sellers and landlords should keep invoices, photos, and documentation related to leak repair. Those records explain what was found, what was corrected, and whether damaged material was dried or restored.
Where Hidden Leaks Commonly Develop
The location of the signs of a hidden water leak can help direct the investigation. Concealed leaks can occur anywhere water travels. However, certain connections and building areas deserve closer observation because they contain pressurized piping, drains, valves, or appliances.
Behind Bathroom Walls
Shower valves, tub spouts, supply connections, and drain assemblies can leak inside a wall or floor. The symptom may appear in an adjoining closet or the ceiling below. If moisture appears only after bathing, document the duration and fixture used. Splashing and failed caulk can mimic a plumbing leak, so timing matters.
Under Kitchen and Vanity Cabinets
Supply stops, faucet lines, traps, disposals, filters, and dishwasher connections can release small amounts of water. Cabinet material often swells before water reaches the floor. Remove stored items, dry the accessible surface, and place a clean paper towel near a suspected connection only if no electrical hazard exists. New moisture can help reveal active seepage.
Near Water Heaters and Appliances
Water heaters, washing machines, refrigerators, dishwashers, and water-treatment equipment use supply or drain connections. A leak may occur only during a cycle. Check the equipment schedule against the time you hear water or notice dampness. Follow manufacturer instructions and do not remove panels.
Beneath Concrete Slabs
Piping below a slab can leak without a visible opening. Possible clues include warm flooring, continuous meter movement, reduced pressure, or moisture near floor edges. Yet none confirms the location. Non-destructive tools may help narrow the search before any flooring or concrete is disturbed.
Between the Meter and the House
A service-line leak may release water underground. Homeowners might notice a consistently damp patch, unusually green growth, erosion, or meter movement during zero use. Irrigation and drainage conditions can create the same surface clues. Responsibility for the line and meter area varies, so confirm the boundary before arranging excavation.
In Crawl Spaces or Attics
Supply and drain pipes can pass through spaces homeowners rarely enter. Damp insulation, stained framing, or moisture below a bathroom may provide clues. Do not enter a tight, wet, mold-affected, or electrically unsafe area. A professional can inspect it with appropriate access and protective equipment.
Who Should Perform Leak Detection?
Homeowners can review bills, conduct a zero-use meter observation, check accessible connections, and document visible changes. These actions create useful evidence without altering the plumbing system. Tenants should report concerns promptly to the property owner or manager and keep a written record.
A plumbing professional should investigate when signs of a hidden water leak persist without a visible source. A technician may divide the system into zones, check pressure behavior, inspect moisture patterns, listen for sound through surfaces, or use thermal imaging. No single tool works perfectly in every building, so results should be interpreted together.
Restoration professionals may be needed when water has affected drywall, insulation, flooring, cabinets, or structural materials. An electrician should assess wet electrical components. Insurance representatives can explain documentation and coverage requirements. These roles overlap, but they do not replace one another: locating the leak, repairing plumbing, drying materials, and restoring finishes are separate tasks.
Expert Tips for Finding Evidence Without Causing Damage
Good leak investigation starts with patterns. Do not chase one stain by cutting the nearest wall. Instead, compare water use, timing, temperature, sound, and moisture. The source may sit above or beside the visible damage because water can follow framing and openings before it appears. Preserve evidence while keeping the household safe.
- Track gallons and dates. Save at least several recent bills and note occupancy or irrigation changes. Gallons offer a clearer comparison than total cost. Add the date and time of every meter check so a plumber can distinguish continuous flow from scheduled appliance or irrigation use.
- Connect symptoms to events. Record whether moisture follows showering, laundry, dishwashing, toilet use, rainfall, or HVAC operation. A drain leak may occur only when water passes through it. A supply leak may continue regardless of fixture use. Timing narrows the possibilities.
- Use removable reference marks. Outline a stain or damp edge lightly with painter’s tape and date it. A larger boundary later shows movement. Avoid permanent ink, nails, or punctures. Photograph the same angle with a familiar object for scale.
- Protect the testing conditions. During a meter check, prevent anyone from flushing or opening a faucet. Pause known automatic uses when appropriate. Otherwise, normal consumption can look like leakage and send the investigation toward the wrong area.
- Ask what each tool will confirm. Thermal imaging shows temperature differences, not water itself. Moisture meters detect material conditions. Acoustic tools listen for sound. Pressure tests assess system behavior. Ask how the technician will combine findings before recommending invasive access.
These expert practices make the signs of a hidden water leak easier to interpret. If the evidence points to concealed plumbing, contact E.R. Services and share your notes before anyone opens a wall, ceiling, or floor.
How Much Does Hidden-Leak Detection Cost?
The cost depends on the size and layout of the home, the type of plumbing, the accessibility of shutoffs, and the testing required. A visible connection beneath a sink may need little diagnostic work. An intermittent leak under a slab or behind finished surfaces can require more time and specialized equipment.
Pricing can also differ between scheduled and urgent service. Repair, material drying, mold remediation, electrical work, and finish restoration may be separate from detection. Therefore, homeowners should ask what the diagnostic charge includes and whether any part applies toward repair.
Before approving work, ask these questions:
- What observations suggest a concealed plumbing leak?
- Which testing methods are included in the quoted price?
- Will the plumber isolate supply, fixture, appliance, and irrigation use?
- Does the scope include opening walls or flooring?
- Will repair and restoration be quoted separately?
- What documentation will I receive after testing?
- What happens if the first suspected area is not the source?
A clear scope helps compare services fairly. The lowest diagnostic price may not offer the same testing or written findings as a more complete evaluation.
Maintaining Plumbing to Reduce Leak Risk
No maintenance plan can prevent every pipe failure. Still, regular observation can catch changes earlier. Inspect accessible supply hoses, stops, faucet connections, water-heater areas, and cabinets. Replace components based on condition and manufacturer guidance rather than waiting for visible failure.
Know where the home’s main water shutoff is located and confirm how it operates before an emergency. Do not wait for water to spread across the floor to search for it. However, never force a corroded or stuck valve. Ask a plumber to assess questionable shutoffs.
Consider water-use alerts or an automatic shutoff device when appropriate for the property. These systems can flag unusual flow or close a valve, but they do not replace maintenance or professional diagnosis. Setup thresholds must match normal household behavior to reduce false alarms.
Keep repair records. Save dates, pipe locations, photographs, materials, warranties, and restoration details. If signs of a hidden water leak appear again, this history can show whether the new symptom is near earlier work or part of a different system.
When a Hidden Leak Becomes an Emergency
Some signs of a hidden water leak allow time for a scheduled assessment. Others require immediate action. Treat the situation as urgent when water is actively spreading, a ceiling is sagging, flooring is lifting quickly, pressure drops suddenly, or moisture approaches electrical equipment.
Take these steps when it is safe:
- Keep people and pets away from the affected area.
- Stop water use throughout the home.
- Use an accessible fixture or main shutoff only if you know how and can reach it safely.
- Do not touch wet electrical equipment, switches, or outlets.
- Contact emergency plumbing help and describe the active conditions.
- Photograph the area from a safe distance.
- Follow professional guidance for water removal and material drying.
If a ceiling bulges, do not stand beneath it or puncture it. If water may contact energized equipment, leave the area and contact the appropriate emergency professional.
Conclusion
The most common signs of a hidden water leak include unexplained water use, meter movement during zero use, warm flooring, recurring odors, damaged finishes, pressure changes, damp cabinets, recurring mold, and running-water sounds. None proves a leak by itself. Together, timing and repeated patterns create stronger evidence.
Start with safe documentation when signs of a hidden water leak appear. Compare gallons, create a true zero-use period, photograph readings, and connect symptoms to fixture or appliance use. Do not open walls, force valves, or enter wet electrical areas. Professional testing becomes useful when the source remains hidden or the damage continues.
E.R. Services can help Rock Hill homeowners evaluate signs of a hidden water leak and narrow the source before repair decisions are made. This service is especially useful when meter movement continues, moisture returns after drying, or several clues point to concealed plumbing. If the evidence suggests a concealed leak, contact E.R. Services for professional testing before opening walls or flooring.
Frequently Asked Questions About Hidden Water Leaks
1. Can a hidden water leak stop and start on its own?
Yes. Some concealed leaks are intermittent because they depend on fixture use, temperature, pressure, or appliance cycles. A shower drain may leak only while someone bathes. A toilet may refill periodically. A loose appliance connection can drip during a wash cycle, while a small pipe opening may release more water when system pressure changes. Intermittent behavior can make the signs of a hidden water leak harder to confirm. Record when the symptom appears and what was running at that moment. Check the meter during a controlled zero-use period more than once if no active damage exists. Do not assume the problem repaired itself simply because a sound or stain stopped changing for a day.
2. How can I tell whether a high water bill comes from a leak or normal use?
Compare consumption in gallons across several billing periods. Then account for events that increased use, such as guests, irrigation, filling a pool, pressure washing, or a longer billing cycle. A dollar increase alone can reflect rate or fee changes. If gallons remain unusually high without an explanation, perform a zero-use meter observation. Make sure toilets, irrigation, ice makers, water treatment equipment, and appliances are idle. Continued movement suggests water is flowing, although it does not identify the source. Save the bills and meter photos. These records help a plumber distinguish a continuous pattern from occasional heavy use and decide which fixtures or piping zones to isolate.
3. Does a musty smell always mean there is a plumbing leak behind the wall?
No. A musty odor indicates that moisture may be present, but plumbing is only one possible source. Indoor humidity, condensation, roof damage, exterior water entry, damp belongings, or HVAC drainage can create a similar smell. The odor becomes a stronger plumbing clue when it concentrates near a bathroom, kitchen, appliance, or pipe route and grows stronger after that fixture is used. Use this observation process:
- Record the room and exact area where the odor is strongest.
- Note whether rain, bathing, laundry, or HVAC operation changes it.
- Check accessible surfaces for staining or swelling.
- Avoid opening walls or disturbing mold-like material.
- Request an evaluation if the odor returns after cleaning and drying.
4. What should a plumber test before recommending that a wall or floor be opened?
A plumber should first review the symptoms, meter behavior, piping layout, previous repairs, and the activities that trigger moisture. Depending on the situation, testing may include fixture isolation, pressure checks, moisture comparisons, acoustic listening, or thermal imaging. These methods narrow the search but do not all prove the exact location by themselves. For example, thermal imaging shows a temperature difference, which may have several causes. Ask the technician what evidence supports the proposed access point and how confident the location is. Also ask what happens if the pipe is not found there. A careful sequence can reduce unnecessary opening while acknowledging that concealed systems sometimes require limited exploratory access.
5. What information should I prepare before E.R. Services checks for a hidden leak?
Bring evidence that shows when and where the problem appears. Useful details include:
- Recent water bills showing gallons and billing dates.
- Start and end photos from a controlled meter check.
- Dates when stains, odors, warm flooring, or pressure changes appeared.
- A list of fixtures or appliances used before each symptom.
- Photos showing whether damage has expanded over time.
- Records from earlier plumbing, roofing, HVAC, or remodeling work.
- The location and condition of accessible shutoff valves.
Tell E.R. Services about water-treatment cycles, irrigation schedules, and products already used. These details help separate normal consumption from the signs of a hidden water leak and guide the first testing steps.
6. Can E.R. Services locate a leak without damaging walls or flooring?
Many investigations begin with non-invasive observations and testing. Meter data, fixture isolation, pressure behavior, acoustic listening, thermal images, and moisture readings can narrow a suspected area before surfaces are opened. However, “non-invasive” does not guarantee that every leak can be located or repaired without access. Insulation, pipe depth, background noise, multiple plumbing routes, and intermittent leakage can limit what equipment reveals. Once evidence identifies the most likely area, a small opening may still be necessary to confirm and repair the pipe. E.R. Services can explain which findings support the proposed location and why a particular access route makes sense. Homeowners should ask for that reasoning before authorizing demolition.
7. When should I ask E.R. Services about an automatic water shutoff system?
An automatic shutoff system may be worth discussing when a home is vacant often, has finished space below plumbing, contains aging supply lines, or has a history of leaks. The device may monitor unusual flow and close the main valve when programmed conditions occur. Yet it must be selected and configured for the household. Irrigation, guests, long showers, water treatment, and appliance cycles can affect alerts. Ask E.R. Services whether the plumbing layout supports the device, whether bypasses or separate irrigation lines exist, and what maintenance it needs. A shutoff system can reduce the duration of some events, but it cannot prevent every leak or replace routine inspection.
8. Should I call the utility or a plumber when the meter moves with every fixture off?
First, confirm that the zero-use conditions are real. Toilets, irrigation, ice makers, softeners, humidifiers, and appliances can use water automatically. If everything is idle and the meter still changes, contact a plumber to investigate the private plumbing system. Contact the utility when the meter itself appears damaged, the leak seems to involve utility-owned equipment, or the utility instructs customers to report continuous-use alerts. Responsibility boundaries differ by location. Do not open the meter box or operate a utility-owned valve unless the utility authorizes it. Share the meter photos and times with both parties if needed. Those records show the observation without claiming where the leak is located.
9. What should I document for an insurance claim after discovering concealed water damage?
Coverage rules vary, so contact the insurer promptly and follow its instructions. In general, preserve a factual timeline rather than guessing about the cause. Photograph the affected area before moving items when it is safe. Record when you noticed the symptom, when water was shut off, who responded, and what emergency steps were taken. Keep plumber findings, invoices, equipment reports, drying records, and restoration estimates. Save damaged items until the insurer explains whether inspection is required. Avoid describing old stains as new or stating that a pipe burst before a professional confirms it. Prompt action to stop further damage and clear documentation can make the event easier to evaluate, but they do not guarantee coverage.
10. Why should Rock Hill homeowners choose E.R. Services for suspected hidden leaks?
The signs of a hidden water leak can overlap with roof, HVAC, drainage, appliance, and humidity problems. Therefore, homeowners need a structured plumbing evaluation rather than a guess based on the nearest stain. E.R. Services can review water-use records, meter behavior, fixture timing, pressure changes, and moisture patterns to narrow the source. The findings can then guide an appropriate repair and help the homeowner understand whether restoration or another specialist is also needed. Before the visit, gather bills, meter photos, symptom dates, and prior repair records. If water is actively spreading or approaching electricity, stop water use when safe and request urgent help. Contact E.R. Services to schedule professional leak evaluation in Rock Hill, SC.